"I Wish I knew this stuff when i started making bread!" - Poppy zaiger, 8th grade
Bread making is a hobby many people share, and homemade bread can be very rewarding. It's extremely easy to mess up if you are a beginner, here are some tips that I wished I knew before making bread.
There are many recipes for making bread, but here are a few recipe recommendations for if you are a beginner or an intermediate. This artisan bread recipe from Kitchen Sanctuary is very helpful for intermediate bakers, since it has only 5 ingredients and it’s very well written, and it has tips for how to bake the bread properly. If you are an absolute beginner you should definitely follow this recipe by King Arthur Baking. It was the first bread recipe I had followed and it’s a good introduction to bread making with photos demonstrating the step-by-step process.
Proofing Yeast
Yeast is the backbone of bread, but it can be confusing for beginners when it comes to proofing the yeast. Proofing yeast is when you add lukewarm water, sugar, and yeast to a bowl and wait for it to foam.
The signs of proofed yeast vary from types of yeast. The most common type in home baking is instant dry yeast because it is found in grocery stores, so these tips apply to instant yeast. Some recipes skip proofing the yeast step by adding all the ingredients together at once and letting the yeast proof during the rising process. But most recipes don’t use this method, so this is how you proof yeast.
1. You want your water to be warm but not hot. If it’s straight from a hot water machine it will kill the yeast.
2. This is more of a suggestion, but you should mix the sugar with water before adding the yeast so the sugar is evenly distributed
3. Don’t mix the yeast in when you add it, just let it do its own thing. If you do, it could mess up the whole proofing process.
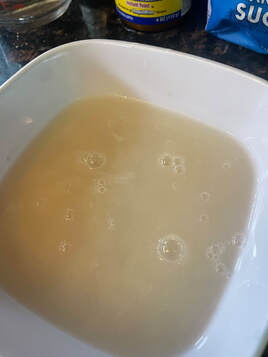
You can tell if your yeast has proofed by a few visual cues. If it looks opaque and has a little bit of foam, it has properly proofed. If you can still see the bottom of the bowl and the yeast is clumping together, that could mean the yeast is either dead or the brand is bad. If you want deeper information on yeast proofing and finding a brand good for you, you can check out Cakes & More's full guide on yeast types and yeast proofing. It’s a helpful read if you want more information.
There are many recipes for making bread, but here are a few recipe recommendations for if you are a beginner or an intermediate. This artisan bread recipe from Kitchen Sanctuary is very helpful for intermediate bakers, since it has only 5 ingredients and it’s very well written, and it has tips for how to bake the bread properly. If you are an absolute beginner you should definitely follow this recipe by King Arthur Baking. It was the first bread recipe I had followed and it’s a good introduction to bread making with photos demonstrating the step-by-step process.
Proofing Yeast
Yeast is the backbone of bread, but it can be confusing for beginners when it comes to proofing the yeast. Proofing yeast is when you add lukewarm water, sugar, and yeast to a bowl and wait for it to foam.
The signs of proofed yeast vary from types of yeast. The most common type in home baking is instant dry yeast because it is found in grocery stores, so these tips apply to instant yeast. Some recipes skip proofing the yeast step by adding all the ingredients together at once and letting the yeast proof during the rising process. But most recipes don’t use this method, so this is how you proof yeast.
1. You want your water to be warm but not hot. If it’s straight from a hot water machine it will kill the yeast.
2. This is more of a suggestion, but you should mix the sugar with water before adding the yeast so the sugar is evenly distributed
3. Don’t mix the yeast in when you add it, just let it do its own thing. If you do, it could mess up the whole proofing process.
You can tell if your yeast has proofed by a few visual cues. If it looks opaque and has a little bit of foam, it has properly proofed. If you can still see the bottom of the bowl and the yeast is clumping together, that could mean the yeast is either dead or the brand is bad. If you want deeper information on yeast proofing and finding a brand good for you, you can check out Cakes & More's full guide on yeast types and yeast proofing. It’s a helpful read if you want more information.
Mixing The Ingredients
Mixing the dough is pretty straightforward, but there are a few things that can go wrong. Here’s what you should know, and how to fix it.
Mixing the dough is pretty straightforward, but there are a few things that can go wrong. Here’s what you should know, and how to fix it.
- When the dough is too sticky, you should add a small amount of flour. If the dough is still sticky, keep adding a little bit of flour each time you knead until it’s not sticky.
- If the dough is too dry, you should add a little bit of water. You should keep doing this until the dough has been fixed.
- If you are hand-mixing the dough, you should keep it in the bowl until all of the ingredients are in one smooth lump.
Letting The Dough Rise
The reason why dough needs to rise is because it builds the bread’s structure and traps gasses into the dough. If you don’t let the dough rise it becomes a dense mess. So, if you don’t want to eat a really under cooked thick dough slab, you should listen to these instructions.
- Oil the bowl that the dough is going to be in.
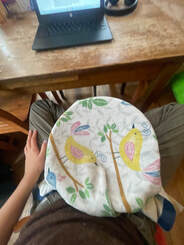
- Put the bread in and cover the bowl with a cloth or tin foil. If you let it sit out in the open air, it will develop a kind of crunchy skin on the surface of the dough and ruin your bread.
- Dough rises best in warm environments, but because it’s winter time and it’s extremely cold, you could put it in a heated room, or you could let it sit on your lap.

4. To check if the dough has risen enough, there are two things that should be done. You could poke the dough and if it puffs back up after, it has fully risen. Or, you could take a little bit of dough, slowly stretch it as thin as it can go without breaking it, and hold it up to a light source. If the light shines through then it’s done.
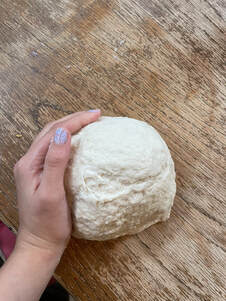
5. Before the second rising, the bread needs to be shaped a bit. If you want smooth bread you use both of your hands to rotate the bread (kind of like massaging it until it’s smooth).
6. The bread gets shaped and goes through a second shorter rise before being put into the oven.
6. The bread gets shaped and goes through a second shorter rise before being put into the oven.
Misc Tips
Here are 2 optional tips you can do that don’t really fit into all of the other instructions.
Here are 2 optional tips you can do that don’t really fit into all of the other instructions.
- If you want a shiny crust, you put a glaze (aka wash) on it. There are many different glazes but the most effective is egg (you can use butter or margarine). You just whisk an egg and spread it on the dough before putting it in the oven.
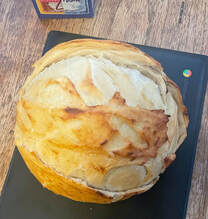
- There is a very cool way of putting a design on bread. Take a knife, cut the design into the bread, and that's it!
Happy bread making everyone! But for longtime readers of my really, really, REALLY stupid articles; you might ponder something, where are the abominable creations? This time I just made bread. What does this have to do with the holidays?
Well, readers, we are near the end of the year, and everyone should turn a new leaf. Everyone should do something to better themselves for the new year. And this is not my new year's resolution, I just wanted to talk about bread. Goodbye you gremlins, and have a happy New Year!
Well, readers, we are near the end of the year, and everyone should turn a new leaf. Everyone should do something to better themselves for the new year. And this is not my new year's resolution, I just wanted to talk about bread. Goodbye you gremlins, and have a happy New Year!
